No one wakes up on a beautiful Saturday morning and thinks, “I really hope I can spend the next five hours on my knees pulling weeds.”
If you have to continuously fight grass that creeps into your flower beds or plants that wilt as soon as the sun reaches them, you need to fix your mulch. Most people think that mulching is just putting down some brown wood chips and leaving them there.
But you need to plan if you want to avoid the never-ending cycle of yard work. If you want a beautiful yard that lets you rest, the “cheat code” is to know how to mulch correctly so you don’t have to do it all the time.
Why Most People Fail at Mulching?
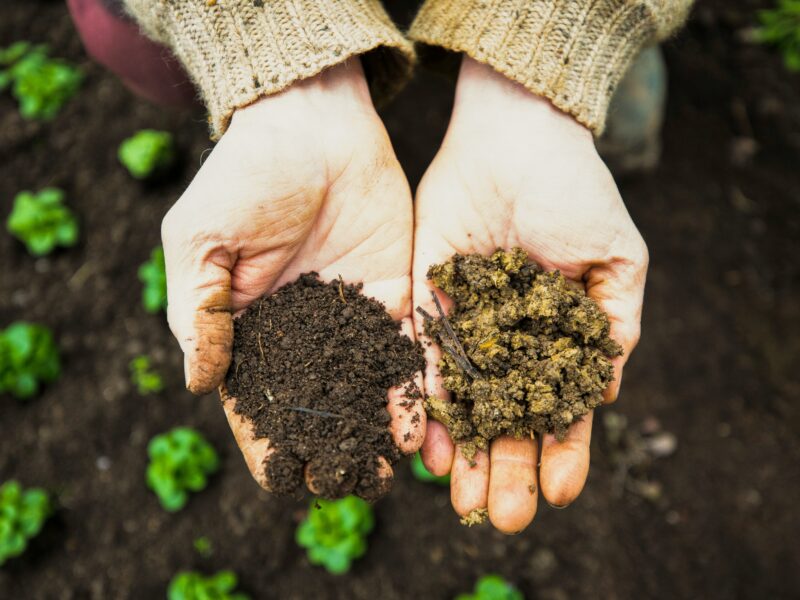
We need to talk about why your existing arrangement isn’t likely to succeed. People mostly use mulch as a decoration. They put down a small layer every two years and then wonder why the weeds are winning the battle.
If you don’t put down enough stuff, the sun can still get to the soil. Sunlight makes weed seeds sprout. If you stack it up like a mountain against your tree trunks, though, you’re just asking for rot and bugs to move in.
The goal is to make a barrier that works. This barrier keeps moisture in, keeps “bad” seeds out, and gently feeds your soil as it breaks down. If you do things right the first time, you’ll have to do less work approximately 80% of the time.
How to Mulch Correctly to Avoid Constant Maintenance?
If you want the quick answer to save your weekend, here is the foolproof way to do it. To keep your garden clean and healthy with as little work as possible, do the following:
- Clear the area completely: You can’t put mulch over weeds that are already there and expect them to die. First, pull them out by the root or use a natural suppressor.
- Edge Your Beds: Dig a clean “V” trench 3 inches deep between your grass and your garden bed. This keeps the roots of the grass from getting into your mulch.
- Put down a weed barrier the natural way: Cover the soil with a layer of plain brown cardboard or five sheets of newspaper without any glossy inserts. Make it wet so it stays put.
- Pick the Right Material: Use a rough, natural mulch like shredded cedar or hardwood. These fit together and don’t come apart easily.
- Add 3 inches of depth: Anything less is only for show, and anything more can kill your plant roots.
- Keep the “Flare” Clear: Mulch should never touch the root of your trees or plants. Leave a space of 2 inches to keep things from rotting.
For more detailed advice on soil health and professional standards, check out the USDA Soil Health guide.
Picking the Best Mulch for a Low-Maintenance Yard
Not all mulch is the same. You would have to rake it back into place every three months if you choose the wrong one. Here is a list of things that really work for a “set it and forget it” way of living.
Shredded Hardwood
Most homeowners think this is the best way to go. The parts “knit” together since they are shredded. This means that it won’t fly away in the wind or during heavy rain.
Cedar Mulch
Cedar costs a little more, but it lasts a long time. It breaks down a lot more slowly than pine. It also includes natural oils that keep some bugs away, so you don’t have to worry about that.
Pine Bark Nuggets
These look fantastic and last a long time, but be careful: they float. These will wind up on your sidewalk after the first storm if your garden is on a slope or you live in a place where it rains a lot.
Straw or Hay (For Vegetable Gardens)
Straw is fantastic for growing food, but make sure it doesn’t have any weeds in it. When you buy inexpensive hay, you’re putting thousands of weed seeds in your garden. That is the reverse of not having to do regular maintenance.
Sheet Mulching
You need to learn about sheet mulching if you want to know how to mulch the right way so you don’t have to keep doing it. This is a permaculture method that kills weeds and makes the soil better.
You don’t just put mulch on the ground; you put a “smother layer” on top of it. This is where cardboard rules. Weeds can’t get through it since it’s a physical barrier, but it gradually rots away and becomes rich soil.
Putting 3 inches of wood chips on top of cardboard makes a two-layered defence. It’s like locking your garden with a deadbolt. Before they reach the light, even the strongest dandelions will give up.
Common Mistakes That Create More Work
When we’re in a hurry to finish the yard, we sometimes make “rookie” blunders that make our lives worse afterwards. Let’s make sure you aren’t doing these things.
The “Mulch Volcano”
You’ve seen it before: mulch piled up 10 inches high against a tree trunk. This means death for trees. It keeps moisture against the bark, which prevents it rot and draws boring bugs to eat it. Don’t make it become a volcano; keep it flat like a doughnut.
Using “Free” Mulch Without Checking
It’s nice to be able to get free wood chips from a utility company in your area. But it can also have seeds from invasive vines or timber that is sick. Make sure it has “cooked” (composted) for a few months before you use it to get rid of the harmful stuff.
Not watering before mulching.
Mulch keeps things warm. It will keep the soil dry for a long period if you put it down on bone-dry ground. Before you put down the mulch, make sure to soak your plants well.
For more technical details on the biology of mulching, the Cornell University Gardening resources offer incredible research-based insights.
Timing is Everything
When you mulch, it is just as essential as how you do it. People hurry outside as soon as they see the first sign of spring. But if the earth is still freezing and thawing, you could be keeping the cold in the soil.
Wait till the ground has warmed up a little and your perennials have started to grow. This makes sure you don’t bury your “good” plants before they have a chance to breathe.
It’s also a good idea to mulch in late fall. It keeps the roots safe from the hard “freeze-thaw” cycle of winter. A firm coating in November means you won’t have to do as much effort in March.
Maintenance Hacks for the “Lazy” Gardener
I call them “lazy” as a compliment. A clever gardener works hard once, so they don’t have to work every day. Here are some other ways to keep things neat:
Pre-emergent weed killers: If you’re okay with utilising a little science, you can halt any seeds that the wind blows in by dusting a weed preventer on top of your mulch.
Top-dressing: You don’t have to change all the mulch every time. A light “top-dressing” of 1 inch is all you need to bring back the colour and the barrier sometimes.
If you see a few weeds in your clean “V” edge, don’t pick them out. Instead, use vinegar. On a sunny day, a simple spritz of strong vinegar will make them shrivel up in a few hours.
Conclusion
In the end, mulching is about more than just making your yard look nice. It’s about making an ecology that can take care of itself. When you take the time to edge your beds, put up a barrier, and use the appropriate amount of material, you are saving time in the future.
Frequently Asked Questions
Can I just put mulch on top of my grass to make a new bed?
Yes! This is known as “lasagne gardening.” Cover the grass with thick cardboard, then add 4 to 6 inches of mulch on top. The grass will turn into compost by the next season, and the soil will be ready to sow.
How often do I actually need to put down mulch?
If you follow the methods for how to mulch correctly, you won’t have to do it all the time. You should only have to renew your beds every 12 to 18 months. Sometimes, high-quality cedar can survive for two years.
Do termites like mulch?
Termites like wood and moisture, but a normal 3-inch covering of mulch won’t “call” them to your house. To be safe, keep the mulch a few inches away from the foundation and siding of your home.
Why is my mulch getting grey?
That’s merely the sun’s natural way of deteriorating things. If it bothers you, you can scrape the top layer to bring the coloured particles to the top, or you can use a dyed mulch as long as the dye is made from vegetables.
The Royal Horticultural Society (RHS) is a great place to go for further information on how to care for different types of plants.