
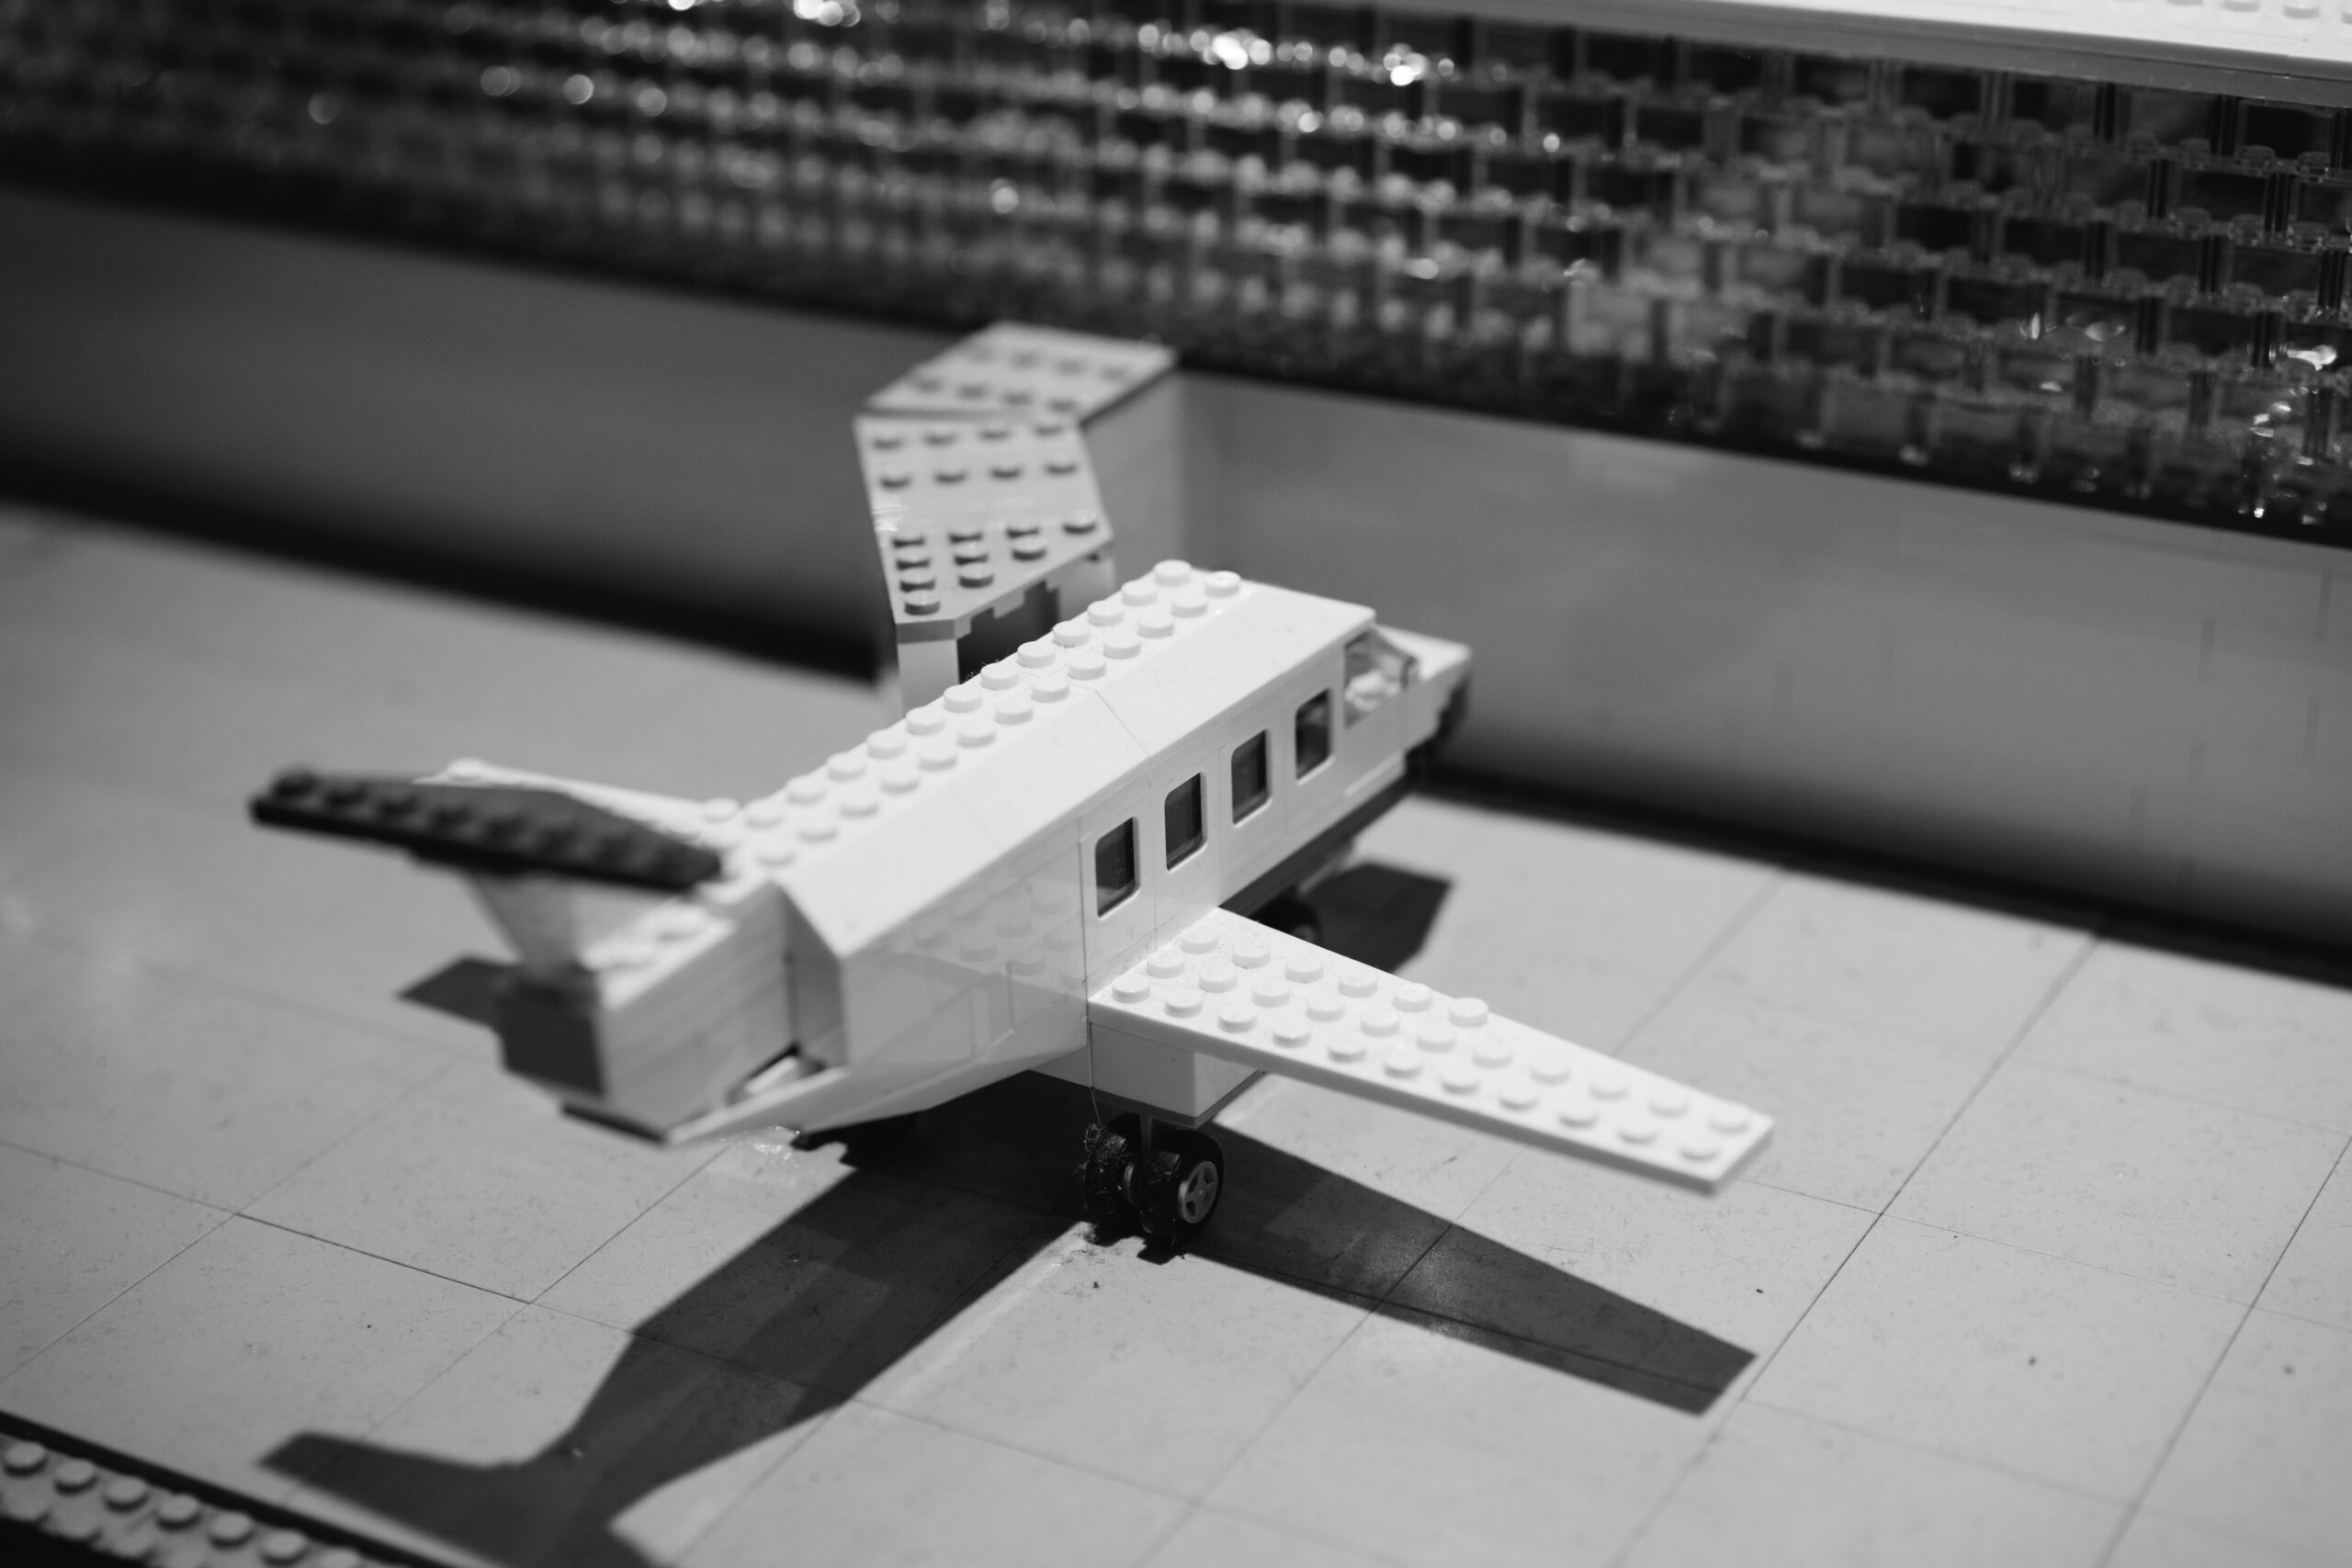
Opening a new model kit elicits a unique, subdued sense of gratification. A miniature piece of history or science fiction that you will construct with your own hands is promised by the intricate grid of the sprues, the styrene plastic’s aroma, and the blueprint-like instructions.
Model construction necessitates a combination of artistic interpretation, patience, and mechanical comprehension. Nevertheless, the barrier to entry can be perceived as high when hobby shop aisles are brimming with specialised cements, hyper-specific paint thinners, and perplexing scale ratios.
This manual eliminates the sense of being overwhelmed. By comprehending the mechanical properties of the plastic, the chemistry of the adhesives, and the methods employed by seasoned builders, you can circumvent the typical frustrations of early builds and immediately begin creating models that you are proud to exhibit.
Choosing Your First Canvas
A common misstep is purchasing a massive, 1,000-piece kit as a first project. Complex kits demand endurance and advanced seam-filling techniques. Starting small builds foundational muscle memory.
For your first few projects, look for kits that practically fall together. Tamiya’s 1/35 scale armor series or 1/48 scale aircraft are legendary in the hobby for their fit tolerances. If you prefer aircraft, a 1/72 scale fighter from Airfix is affordable and can be hand-brushed easily.
If you want to bypass glue entirely while learning the mechanics of assembly, Bandai’s Entry Grade (EG) Gunpla kits utilize precise snap-fit engineering.
Understanding Scale: Scale denotes the ratio of the model to the real-life object. A 1/72 scale P-51 Mustang means the real aircraft is 72 times larger than the model. Cars are traditionally 1/24 or 1/25, military armor is heavily standardized at 1/35, and tabletop miniatures are often 28mm or 32mm scale.
The Essential Toolkit (And What to Skip)
You do not need a sprawling workshop to build models, but substituting proper tools with household items usually leads to damaged plastic. Invest in a few core items from the start.
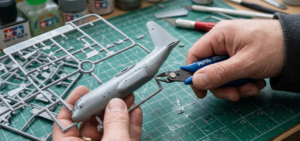
- Flush Sprue Cutters (Nippers): Never twist a part off the sprue by hand. This tears the plastic, leaving a white stress fracture or a gouge in the part. Flush cutters have one flat side to cut cleanly against the part.
- Hobby Knife with #11 Blades: Used for scraping away mold lines (the faint raised lines where the two halves of the steel mold met at the factory) and slicing away the remaining plastic nubs.
- Abrasives: Standard sandpaper is often too harsh. Pick up sanding sticks or sponge pads ranging from 400 to 1200 grit. Sponges conform beautifully to the curved fuselages of aircraft or the fenders of cars.
- Tweezers: Essential for placing tiny decals or holding small parts during painting.
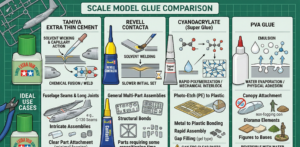
The Chemistry of Adhesives
Model glue does not work like household craft glue. Understanding how it bonds is critical to a clean build.
Plastic Cement (The Solvent Weld)
Plastic cement actually melts the styrene, fusing two pieces in a chemical weld.
- Thin Cement (e.g., Tamiya Extra Thin): This is the industry standard. You hold two dry pieces of plastic together, touch the brush applicator to the seam, and capillary action pulls the watery cement along the joint. It dries rapidly and leaves no messy residue.
- Thick Cement (e.g., Revell Contacta): Dispensed through a needle applicator, this has a slightly longer working time. It is useful for beginners who need a few seconds to adjust a part’s alignment.
Pro-tip: If the metal needle clogs, briefly run a lighter flame under it to burn out the dried glue.
Cyanoacrylate (Super Glue)
Super glue (CA) creates a mechanical bond rather than a chemical weld. It is mandatory if your kit includes metal photo-etched details or resin parts. It also has a hidden benefit: CA glue creates a brittle bond.
If a miniature is dropped, it will often break cleanly at the CA-glued joint, a makeshift “fault line” making it easy to repair, whereas a plastic cement weld might tear the surrounding plastic.
PVA Glue (White Glue)
Never use plastic cement or super glue on clear parts, like aircraft canopies or car windshields. The outgassing from CA glue will permanently “fog” the clear plastic. Always use PVA (wood glue) or specialized canopy glue, which dries completely clear and will not react with styrene.
Step-by-Step Implementation: The Build Process
- Wash the Sprues (Optional but Recommended): Manufacturing processes sometimes leave a microscopic film of mold-release agent on the plastic. A quick wash in warm, soapy water ensures paint and glue adhere perfectly.
- Cut and Clean: Snip the part from the sprue, leaving a tiny fraction of a millimeter of plastic attached. Use your hobby knife to shave this nub down flush, then gently sand the area.
- Dry Fitting: Always test-fit parts before applying any glue. Manufacturers occasionally leave alignment pins slightly too long, or flash (excess plastic) might block a clean fit. Adjusting parts dry prevents panic when the glue is melting the plastic.
- Sub-Assemblies: Do not build the entire model before painting. Build it in logical sub-assemblies. For a tank, build the turret and the hull separately. For an airplane, the cockpit must be fully painted and weathered before it is trapped inside the two fuselage halves.
Demystifying Paints: Acrylics, Enamels, and Lacquers
Walking into a hobby shop paint aisle is intimidating. Model paints fall into three distinct chemical families, and mixing them improperly will ruin a model.
Paint Chemistry Comparison
| Feature | Acrylics | Enamels | Lacquers |
|---|---|---|---|
| Base | Water / Alcohol | Oil / Organic Solvent | Strong Solvent |
| Drying Time | Minutes (fast) | Hours to Days (slow) | Seconds to Minutes |
| Durability | Moderate | High (excellent leveling) | Extremely Hard |
| Toxicity / Odor | Low | Medium to High | Very High |
| Best Use | Brush painting, miniatures | Washes, weathering, and military | Car bodies, high-gloss finishes |
The Golden Rule of Layering: You can safely apply a chemically “weaker” paint over a fully cured “stronger” paint, but not vice versa.
- Safe: Acrylic over Enamel, or Enamel over Lacquer.
- Disaster: Applying “hot” Lacquer over an Acrylic base coat will cause the underlying acrylic to blister, wrinkle, and peel instantly.
Paint Application Techniques
Always start with a spray primer (like Games Workshop Chaos Black or Tamiya Fine Surface Primer). Primer creates micro-abrasions that give your base coats something to bite into.
When brushing acrylics, never apply paint straight from the pot. Thin it with a drop of water or acrylic thinner on a palette until it reaches the consistency of milk.
Applying “two thin coats” preserves the microscopic surface details of the model, whereas one thick coat will bury rivets and panel lines.
Proper Ventilation in the Hobby Workspace
If you choose to work with enamels, lacquers, or spray primers, managing fumes is a health and safety requirement, not a suggestion. Volatile Organic Compounds (VOCs) and aerosolized particulates accumulate quickly in standard rooms.
If you are setting up an airbrush booth, calculate the required airflow volume of your exhaust fan, measured in Cubic Feet per Minute (CFM).
An effective setup relies on an inline duct fan pulling stale air and overspray out through a window, combined with a fresh air intake (like an open door on the opposite side of the room) to create continuous cross-ventilation.
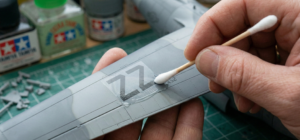
Decals: Avoiding the “Silvering” Disaster
Waterslide decals are printed images on a microscopically thin carrier film. When applied poorly, microscopic air bubbles get trapped under the clear film, reflecting light and making the transparent edge look like shiny silver. This ruins the illusion of a painted-on marking.
The Fail-Proof Decal Method:
- Gloss Coat First: Never apply a decal to matte paint. Matte paint is microscopically rough, trapping air. Spray the area with a gloss clear coat to create a glass-smooth surface.
- Warm Water: Warm water loosens the decal adhesive in seconds, whereas cold water makes the decal brittle. Practical trick: Use a cheap coffee mug warmer to keep your decal water perfectly warm during long sessions. Dip the decal for precisely 10 seconds, then set it on a paper towel to loosen.
- Setting Solutions: Apply a drop of setting prep (like Micro Set) to the model, slide the decal off the backing paper using a brush, and wick away excess moisture with a cotton swab.
- Softening Solutions: Once placed, brush a softening solvent (like Solvaset or Micro Sol) over the decal. Do not touch it after this. The solvent actively melts the decal into the panel lines and rivets of the plastic. It may wrinkle terrifyingly—leave it alone. It will pull down perfectly tight as it cures.
Weathering: Telling a Story with Grime
A freshly painted model often looks like a toy. Weathering gives it mass, history, and scale. Do not weather everything uniformly; a car looks dusty, a steam locomotive gets covered in soot, and a tank accumulates caked mud.
- The Wash: To make panel lines and recessed details pop, apply a thin wash (like Citadel’s Agrax Earthshade or a highly thinned oil paint) over the model. Capillary action will pull the dark pigment into the recesses, simulating shadows and accumulated grime.
- Drybrushing: To highlight raised edges, load a broad, flat brush with a lighter shade of your base color. Wipe almost all the paint off onto a paper towel until the brush is virtually dry. Lightly dust the brush over the model’s raised edges to simulate worn paint and catch the light.
- Pastels and Pigments: Scrape cheap artist pastels into a fine powder. Brush these powders onto exhaust pipes to simulate rust, or around the lower hull of a tank to replicate dry dust. Seal it gently with a matte varnish.
Mini Case Study: Rescuing a Ruined Canopy
Scenario: A builder accidentally drops a bead of Tamiya Extra Thin cement onto the transparent canopy of a 1/48 F-16. The solvent instantly clouds the plastic.
The Fix: Rather than throwing the kit away, the builder uses progressively finer sanding sponges (800, then 1200, then 2000 grit) to sand the frosted plastic entirely flat.
Finally, polishing compounds (like Tamiya Polishing Compound Fine and Finish) are buffed into the plastic, restoring optical clarity perfectly.
Common Beginner Mistakes to Avoid
- Skipping the Dry Fit: Applying glue, assuming the parts will fit perfectly, often leads to misaligned wings or massive hull gaps.
- Over-Gluing: Squeezing a tube of cement along a fuselage seam will cause the melted plastic to ooze out of the joint, destroying the panel line details. Switch to extra-thin liquid cements.
- Ignoring Seam Lines: Leaving the seam where two fuselage halves meet, highly visible, breaks the illusion of scale. Use a modeling putty (like Milliput or Tamiya Basic Putty) to fill the gap, then sand it flush.
- Heavy-Handed Weathering: It is easy to get excited and cover an entire tank in mud texture. Subtlety is key. Build up in very light, transparent layers.
Final Thoughts
The procedure of model building is iterative. Your initial kit may exhibit a decal that is not precisely aligned, a slightly foggy clear part, or a visible seam line. That is the essence of a tactile, skill-based pursuit.
Understanding the manner in which the plastic responds to your tools, the manner in which cement flows, and the manner in which paint levels on the surface are the primary goals of your initial construction, rather than achieving perfection.