After completing the fiber optic internet setup in all eight lobbies of our property, I thought the hardest part was over. But then I realized, simply having internet in every lobby isn’t enough. As the IT for The Residences at Commonwealth, my job doesn’t stop at connectivity; I also need to manage bandwidth, secure the network, and monitor system usage across multiple offices.
This brought me to my next big task: setting up a server for network control and monitoring.
Why Just Internet Isn’t Enough
When you’re working in property management IT, especially for a large development, internet access alone doesn’t solve everything. Here’s why:
- Some offices download large files that slow down the entire network.
- We can’t track or limit who uses how much bandwidth.
- We need logs and traffic control to prevent abuse.
- And we want better security between departments.
I needed a centralized solution that didn’t just provide internet but allowed me to manage and secure the whole network, at a low cost.
Why We Chose pfSense
A fellow IT from another CPMI-managed property suggested pfSense. I’ve heard of it before, but never had a chance to try it on a live network. When I dug deeper, I found it perfect for our use case. Here’s why:
- pfSense is free and open-source, so it’s budget-friendly.
- It offers advanced features like firewall management, bandwidth control, VPN, DHCP, and DNS.
- It works well even on older or mid-range hardware.
- It has strong community support and plenty of tutorials online.
I’m so happy because it’s a perfect fit for our setup.
I presented this to our property admin, and after a short discussion, they approved the purchase of a new dedicated PC to be used as our pfSense server.
Hardware Specs: You Don’t Need an Expensive Server
Many think you need high-end equipment to run a firewall or network server. But pfSense is very lightweight. We bought a new PC specifically for this task, with the following specs:
- CPU: Intel Core i3 4th Gen
- RAM: 8GB DDR3
- Storage: 240GB SSD
- NIC: Dual LAN ports (Intel-based recommended)
Believe it or not, this is more than enough for managing dozens of connected computers and IP phones across our property.
If you’re working in IT on a tight budget, this kind of affordable server setup using pfSense is highly recommended
The Setup Process
Here’s how I did the pfSense setup:
- Download pfSense ISO from the official site.
- Create a bootable USB using Rufus.
- Boot the PC from USB and follow the installation steps.
- Assigned WAN and LAN interfaces.
- Logged in to the pfSense web GUI (default: 192.168.1.1).
- Configured the local IP range and enabled DHCP.
After that, I connected our main internet line (from PLDT Enterprise 500 Mbps) to the WAN port, and the LAN port to a switch going out to all offices.
During setup, I also enabled:
- Firewall rules to block suspicious IPs.
- Bandwidth limiter for shared office PCs.
Medyo nakaka-pressure kasi this is the first time I’m doing it for a live working environment, but it worked well!
Connecting All Office Computers
I made sure every office, Admin, Accounting, Engineering, Concierge, was routed through the pfSense server. Using our previously installed fiber optic lines, I was able to:
- Verify each lobby’s switch and media converter was connected properly.
- Set static IPs for important workstations and printers.
- Check internet speed per tower using iperf and browser-based tools.
- Confirm that no one was bypassing the network (isang importanteng bagay sa security!)
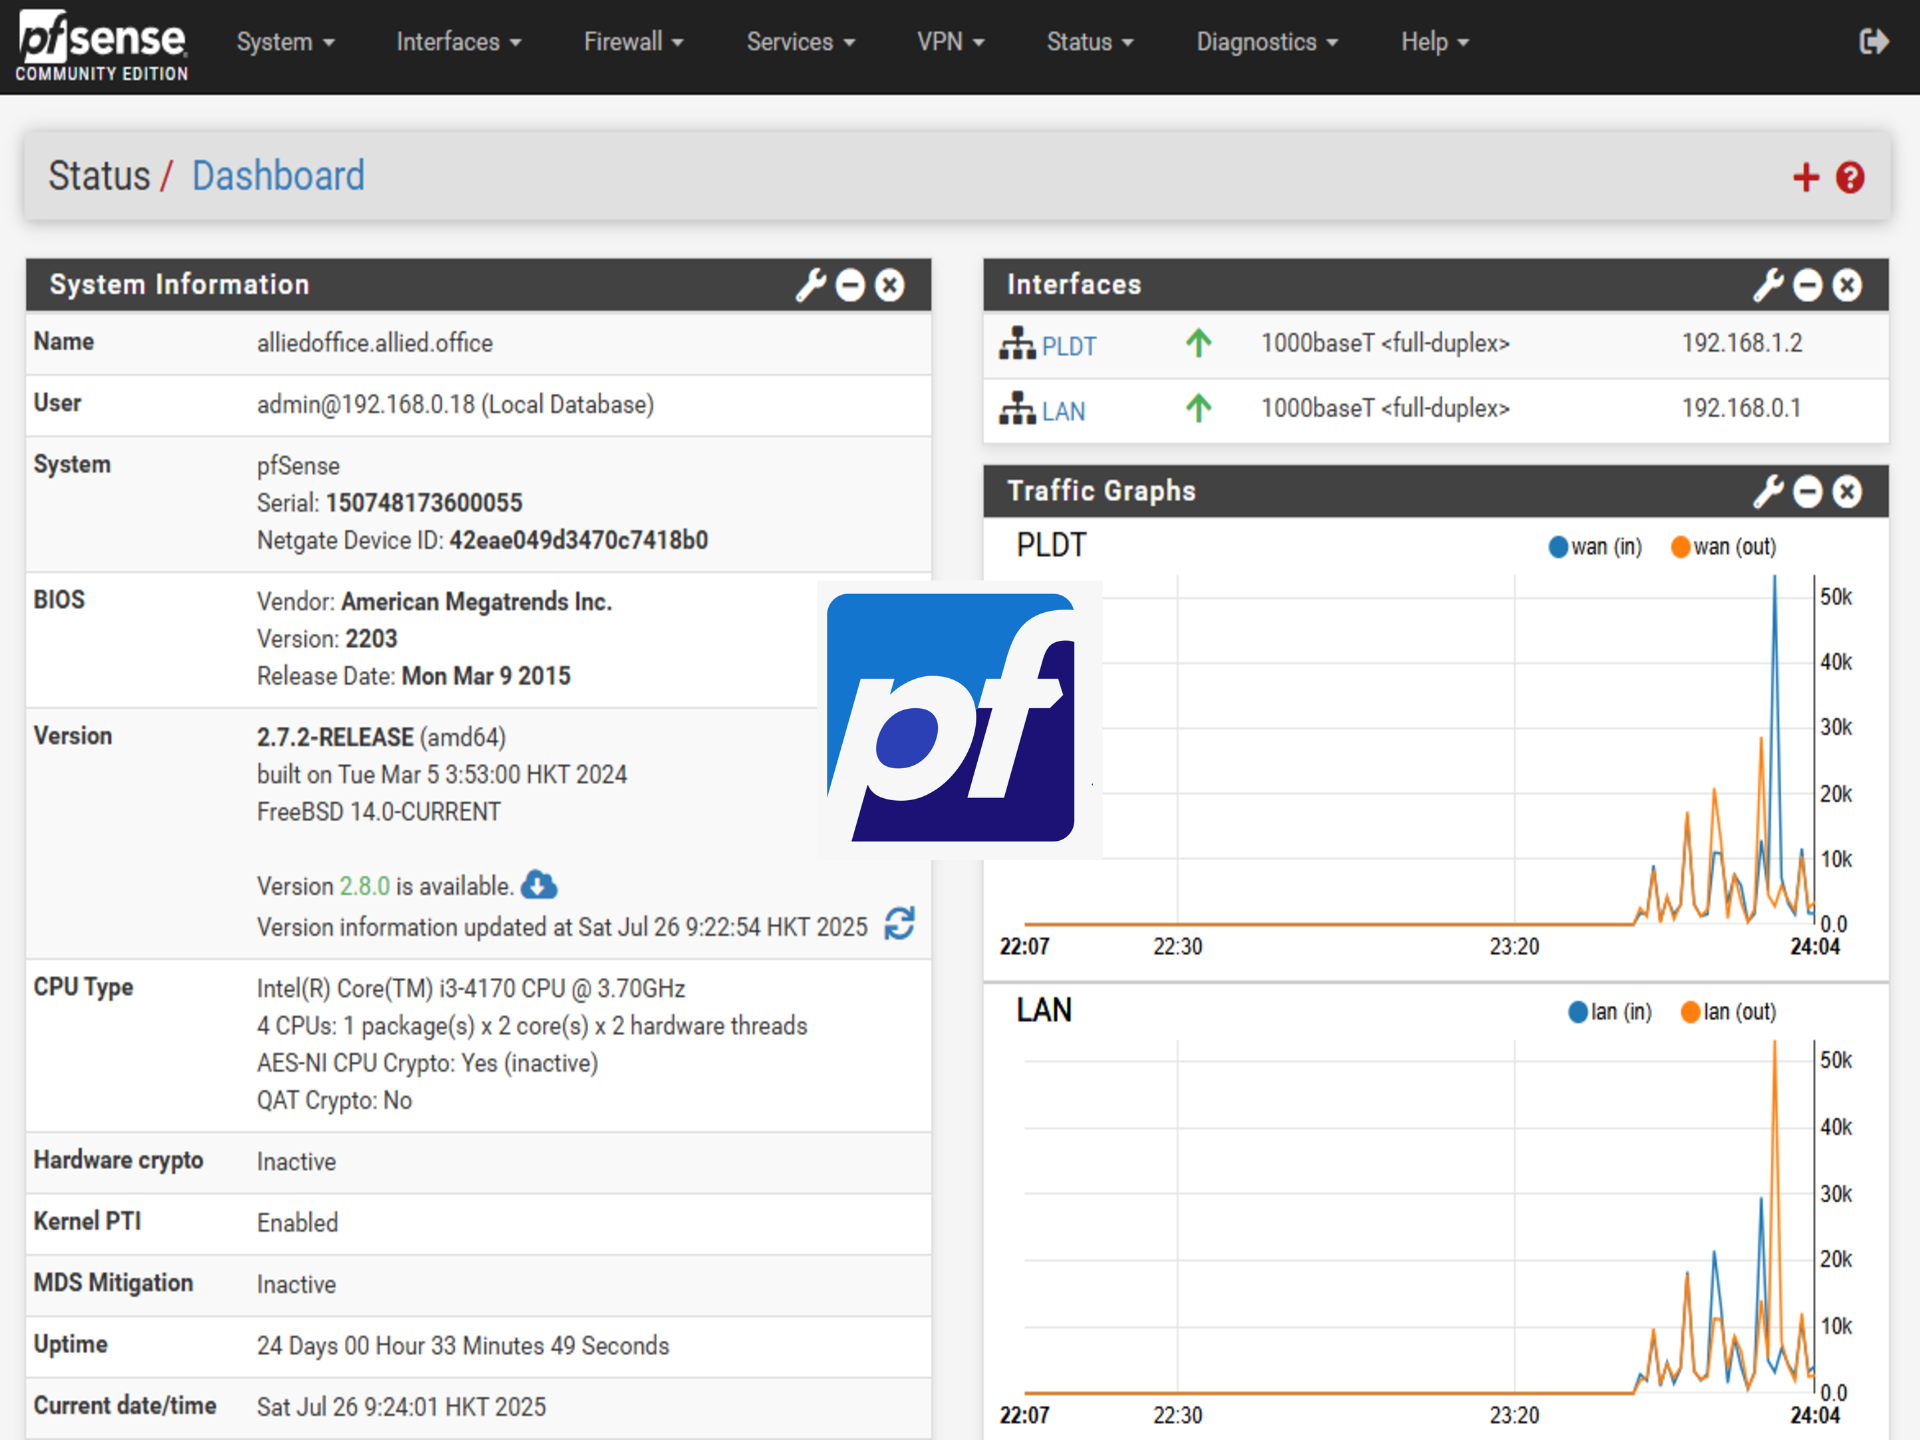
Monitoring & Managing the Network
Now that pfSense is live and running, I can:
- See which devices are online at any time.
- Monitor how much bandwidth each department is consuming.
- Get alerts when something suspicious happens.
- Implement future plans for content filtering and site blocking (hello YouTube during office hours haha!).
The dashboard view is amazing, clear, detailed, and real-time. Sobrang helpful sa isang one-man IT team like me.
Final Thoughts
It took around two months to complete the full project, setting up 8 lobbies with fiber optic internet, installing switches, laying LAN cables, and finally configuring a working pfSense server.
Yes, we had delays (kulang sa materials, waiting for deliveries), but the results were worth the wait.
Now, we have a centralized, secure, and optimized network across the entire property.
What’s Next?
In my next blog, I’ll guide you through:
- How to set static IP addresses in pfSense
- Setting up a custom DNS server
- Tips on firewall rules and bandwidth throttling per department
If you’re in property management IT or just looking for a budget-friendly firewall and server solution, pfSense is worth trying. Thanks for reading, and I hope this helped!