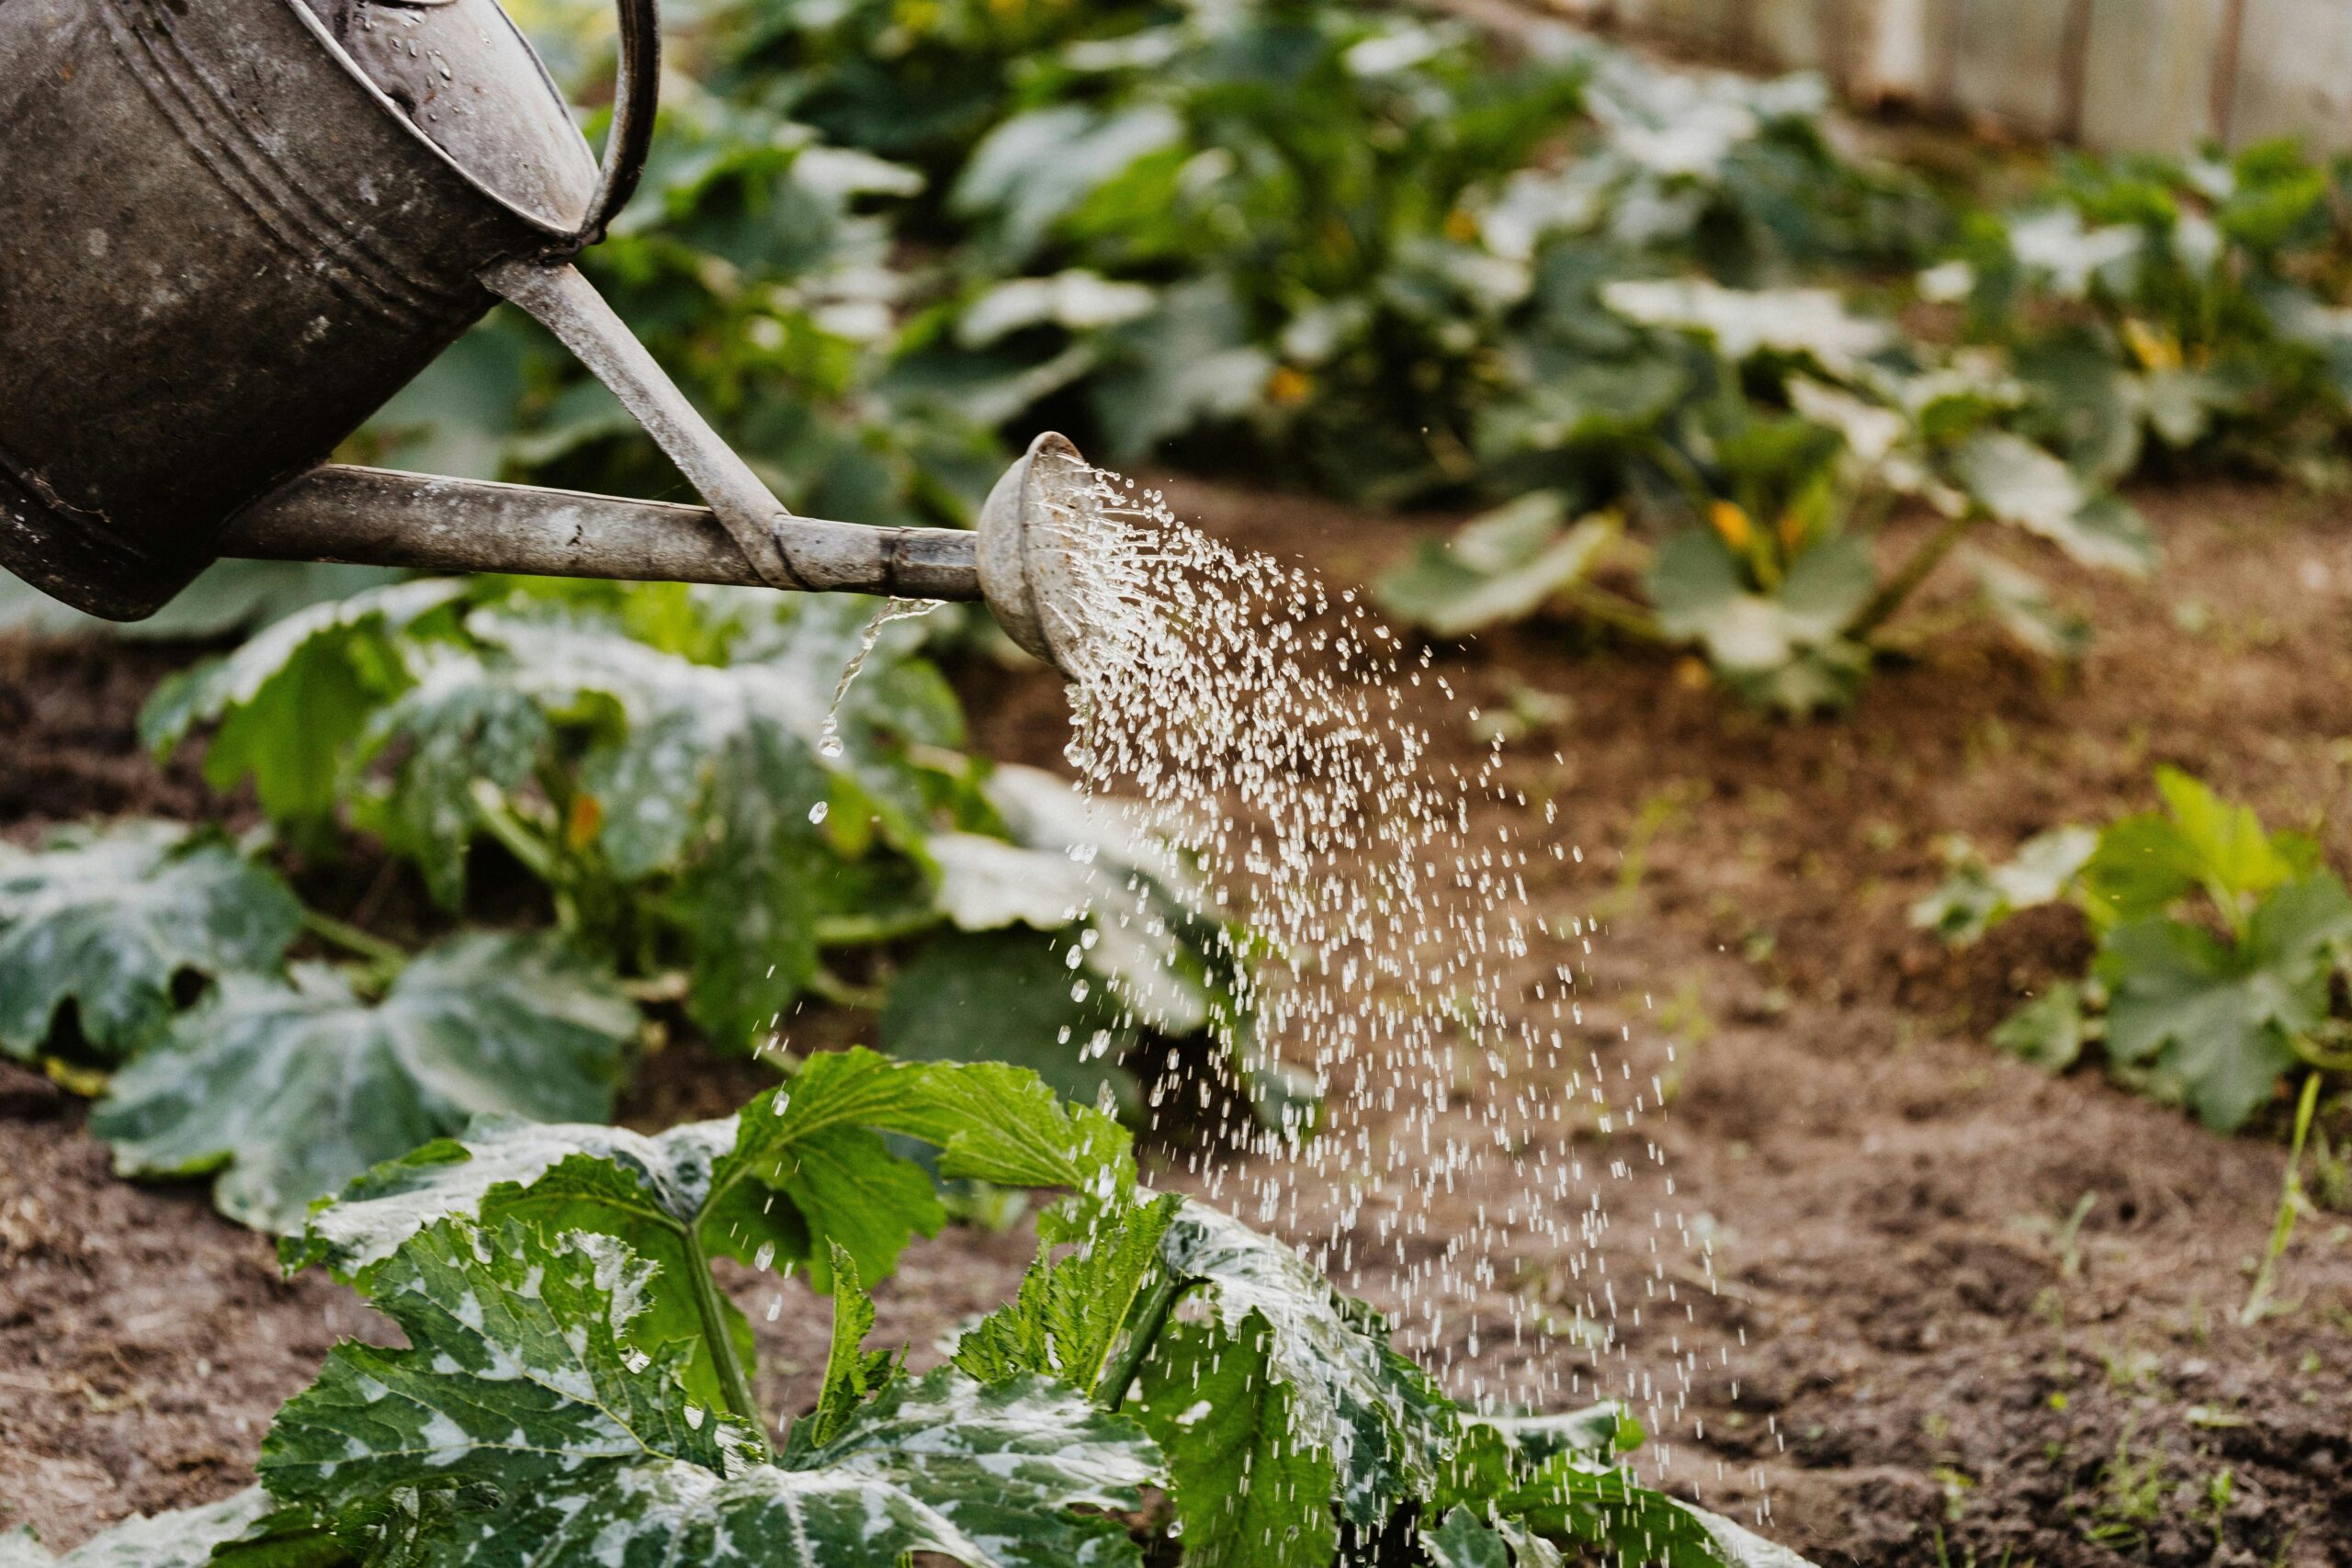
If you have ever stood with a hose over a dry vegetable bed in the middle of August, you are already aware that hand-watering rapidly becomes tedious. It is incredibly inefficient as well.
Instead of watering the roots, we usually water the leaves, and a large amount of that liquid evaporates before it can reach the soil.
The best method to save time, save water, and enhance plant health is to build your own DIY irrigation system.
However, it can be intimidating to enter a hardware store’s irrigation section. There are countless possibilities, including emitters, micro-tubing, pressure regulators, and timers.
Moving Beyond the Garden Hose

The “best” irrigation system depends entirely on your climate, water source, and what you are growing. A system that thrives in a humid, rainy environment might cause devastating fungal diseases in a dry, hot one if misapplied.
1. Traditional Drip Irrigation (The Gold Standard)
Drip irrigation is exceptionally efficient—often exceeding 90% efficiency compared to the 50–70% efficiency of standard sprinklers. By delivering water slowly and directly to the soil via point-source emitters or inline drip tubing, you avoid wetting the foliage.
This is critical for disease-prone crops like tomatoes, peppers, and cucumbers, where wet leaves invite blight and powdery mildew.
Trade-offs: It requires an upfront investment and involves a slightly complex setup with pressure regulators and filters.
2. The Custom PVC Drip Manifold
If you are growing in straight rows or raised beds and want a nearly indestructible, low-cost system, you can build a surface-mounted manifold out of 1/2-inch PVC pipe.
Rather than using heavy Schedule 40 PVC, opt for the thinner, cheaper Schedule 20 pipe.
To build it, tape three pipes together side-by-side, draw a straight line down the joints with a marker, and then drill holes along that line using a tiny 1/16-inch drill bit. By keeping the holes perfectly aligned, the water cascades gently out of the side of the pipe directly onto the root zone, rather than shooting wildly into the air.
Trade-offs: It is rigid. PVC cannot snake around curved ornamental borders the way flexible poly tubing can.
3. DIY Terracotta Ollas (Zero-Pressure Capillary Watering)
Ollas are an ancient method utilizing unglazed clay vessels buried in the soil. You fill the vessel with water, and as the surrounding soil dries, moisture leeches through the porous clay directly to the plant roots via capillary action.
You can easily build your own for a fraction of the retail cost. Take two identical, unglazed terracotta pots. Glue a quarter (or similar coin) over the drainage hole of the bottom pot using waterproof silicone caulk.
Apply a thick bead of silicone around the rim, place the second pot upside down on top of it, and let it cure for 24 hours under a heavy book. Bury the glued pots, leaving just the open top hole exposed above the soil to fill with water.
Cover the top hole with a terracotta saucer to prevent mosquitoes from breeding.
Trade-offs: You have to refill them every few days manually, and their watering radius is only about twice the width of the pot itself.
The Anatomy of a Reliable Drip Setup
If you choose to run poly tubing, the success of your system relies on the components sitting between your spigot and the garden bed. Standard municipal water pressure often runs between 40 and 100 PSI, but drip components are designed to operate at a gentle 10 to 30 PSI.
If you connect a drip line directly to a spigot, the pressure will blow the emitters right off the tubing.
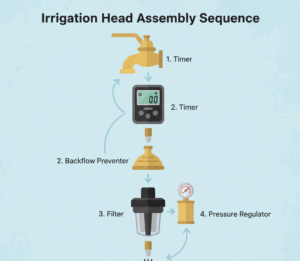
Essential Inline Components
To build a system that lasts, you must assemble the “head” of your system in this exact order:
- Timer: Automates the watering schedule.
- Backflow Preventer (Anti-Syphon Valve): Essential if using city water. It stops dirty garden water from being sucked back into your home’s drinking supply if there is a sudden drop in municipal pressure. Install this at least 12 inches higher than your highest emitter.
- Filter: Drip emitters have microscopic openings that clog easily. You need a 120- to 200-mesh screen or disk filter. (If you use a rain barrel, a 100-micron streamlined filter works best.
- Pressure Regulator: Reduces the incoming line pressure down to a safe 25 or 30 PSI.
Designing for Soil Texture
One of the most frequent mistakes I see is gardeners running the same emitter spacing and flow rate in heavy clay as they do in loose sand. Water moves through the earth differently based on soil texture.
- Sandy Soil: Water drops rapidly in a narrow, vertical column. You need higher flow rate emitters (e.g., 2.0 gallons per hour) spaced closely together (every 6 to 12 inches).
- Loamy/Clay Soil: Water spreads outward horizontally before moving down, creating a wide, bulb-shaped wetted area. You can use lower flow emitters (0.5 to 1.0 GPH) spaced further apart (every 18 to 24 inches).
The “Pulse Irrigation” Technique
If you garden in highly porous, sandy soil, running your drip system for an hour will push the water deep past the root zone, wasting it. Instead, utilize pulse irrigation.
This means setting your timer to water for 15 minutes, waiting an hour, and then watering for another 15 minutes. This keeps the moisture suspended in the active root zone.
Gravity-Fed Systems: Running on Rain Barrels
Irrigating with captured rainwater is incredibly rewarding, as it is free of the municipal chlorine that can inhibit soil biology. However, designing a gravity-fed drip system requires a shift in physics.
Drip irrigation does not require high pressure; it requires the system to be flooded with water. Gravity dictates that 1 foot of vertical elevation generates roughly 0.43 PSI of pressure. Therefore, a rain barrel sitting on a 3-foot cinderblock stand is only generating about 1.3 PSI.
To make this work:
- Use High-Flow Spigots: Standard brass spigots have narrow internal gate-valves that restrict flow. Swap them out for full-port, high-flow valves.
- Zero-Pressure Timers: Standard automatic timers require internal water pressure to force the valve shut physically. If you use a standard timer on a rain barrel, it will open, but it will never close, draining your entire water supply. You must purchase a timer specifically rated for “zero pressure.”
- Mind the Topography: Water will never flow uphill above the water level inside the barrel. Keep your 1/2-inch mainline flat or sloping slightly downhill.
- Limits on Emitter Lines: Without high pressure, water cannot push through long, restrictive runs of 1/4-inch tubing. Keep the inline emitter runs very short, no more than 16 feet if emitters are spaced 6 inches apart.
If your barrels are flat on the ground and you need to push water across a larger yard, you will need a small pump.
A solar-powered drip kit, which features a timer with a built-in pump connected to a small solar panel, is a fantastic, off-grid solution to pull water out of a stagnant barrel and push it through the lines.
Case Study: Retrofitting an Urban Raised-Bed Setup
Consider a common scenario: a 400-square-foot backyard with three 4×8 raised beds growing mixed vegetables. The homeowner previously watered by hand, leading to localized dry spots and powdery mildew on squash leaves.
The Solution: Instead of ripping out the raised beds, we mapped the beds into a single hydrozone. We attached a battery-operated timer, a 150-mesh filter, and a 25 PSI regulator to the house spigot. We ran a 1/2-inch blank “mainline” poly tube along the ground behind the beds.
At each bed, we cut the mainline, inserted a “T” fitting, and ran a line up the corner of the wood into the bed. Inside the bed, we laid out 1/4-inch inline drip tubing with emitters spaced every 9 inches.
The Result: The system runs at 6:00 AM for 30 minutes, three days a week. Because the water is delivered slowly, directly to the loamy soil (0.9 GPH per emitter), there is zero runoff. The squash foliage remains completely dry, and the powdery mildew issue has vanished.
Common Mistakes That Ruin DIY Systems
Even well-designed systems fail if poorly managed. Avoid these frequent pitfalls:
- Improper Zoning: Do not put drought-tolerant lavender on the same watering line as thirsty cucumbers. Map your garden and group plants with similar water needs onto the same valve.
- Neglecting Level Ground for Soaker Hoses: Soaker hoses are great for dense hedge rows, but they must be laid on perfectly level ground. I have made the mistake of stringing them across uneven beds—the low spots become a swamp, and the high spots stay bone dry.
- Watering in the Midday Sun: Up to 50% of water applied in full sun on a breezy day evaporates before the plant can use it. Water in the early morning or late evening.
- The “Set It and Forget It” Fallacy: A system needs seasonal adjustment. As plants grow, their root systems expand outward. Do not add emitters near the trunk; move them out to the “dripline” (the edge of the canopy) where the active feeder roots live. Furthermore, you must reduce watering times during cool, rainy weeks and increase them during heat waves.
Practical Layout & Spacing Guide
Use this quick-reference table to determine how to lay out your inline drip tubing based on your native soil type.
| Soil Texture | Water Movement | Suggested Flow Rate | Emitter Spacing | Line Spacing (Rows) |
|---|---|---|---|---|
| Sandy | Fast, narrow, downward | 1.0 to 2.0 GPH | 6 to 12 inches | 12 inches |
| Loam | Moderate, bulb-shaped | 0.8 to 1.0 GPH | 12 to 18 inches | 18 inches |
| Clay | Slow, wide, horizontal | 0.4 to 0.6 GPH | 18 to 24 inches | 24 inches |
Data derived from standard horticultural spacing metrics for inline emitters.
Final Thoughts
The long-term benefits of switching to a do-it-yourself irrigation system are enormous, but it takes an afternoon to measure, cut, and put plastic fittings together. By
You may protect your plants from foliar disease, drastically lower your water bill, and create a garden that is self-sufficient mainly by paying attention to the texture of your soil, estimating your flow rates, and administering water straight to the root zone. Map out your hydrozones, start small, and let the system handle the heavy lifting.