How to Start Wood Carving as a Complete Beginner?

Every new carver remembers the moment when the knife first works with the wood instead of against it. The shaving curls up, and the grain opens up, and you understand that this isn’t about raw force at all. This guide is all about getting to that point faster and with less stress.
Carving wood is one of the easiest skills to learn. You don’t need any power equipment, and you can finish your first project in an afternoon. But the internet either makes it too simple (“just grab a knife!”) or gives newcomers a lot of tool lists and technical terms before they’ve even made a cut.
Why Wood Carving Is Different From Other Crafts?
Putting things together is a big part of most crafts. When you carve wood, you have to think backwards since you are taking away stuff and making choices that can’t be changed. It seems scary, but if you embrace it, you will feel free. Design choices originate from mistakes. A chip in the wrong position produces a textural detail. The wood itself often informs you what to do next.
This is also why beginners should start with soft, forgiving woods. Basswood is the most common choice, and for good reason: it’s consistent, cuts cleanly in both grain directions, and doesn’t punish little mistakes the way pine does, which has hard and soft grain lines that aren’t always easy to see. Butternut is another great choice. The grain has a little more character, but it’s just as forgiving.
Hardwoods like cherry or walnut are gorgeous, but they may be very hard on your hands when you’re still learning how to use a knife. Keep them as a prize. One useful tip: for the first 10 to 15 hours of carving, only use basswood. After that, you can add harder woods.
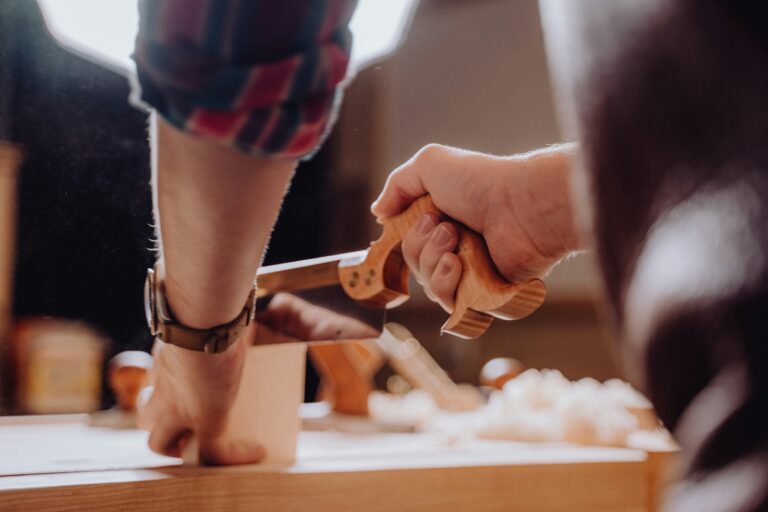
The Honest Tool Conversation
You do not need many tools. What you need is the right few, kept sharp.
The single most important tool for a beginner is a sloyd knife, a short-bladed carving knife, typically with a blade between 60 and 90mm. Its length gives you control. Its versatility means you can rough out shapes, refine curves, and add basic detail all with one tool. Brands like Mora (their 120 or 122 are classics), BeaverCraft, and Flexcut all make reliable beginner options in the $15–35 range.
The second tool worth owning early is a hook knife (also called a spoon knife). It looks strange, a curved, almost C-shaped blade, but once you understand it, carving concave shapes like spoon bowls becomes intuitive rather than frustrating. The motion is similar to peeling an apple: you pull the blade toward you in a controlled arc. When used correctly, it’s actually harder to injure yourself than with a straight knife because the curve naturally limits the blade’s travel.
You don’t need a set of 15 gouges. You don’t need a mallet. You don’t need an axe yet (though it becomes useful once you’re working with green wood or larger blanks). Start lean.
Sharpness Is Not Optional
A dull knife is genuinely more dangerous than a sharp one. A sharp blade requires light, controlled pressure to cut; a dull blade requires force, and force leads to slips. Within your first week, learn to use a strop, a piece of leather loaded with polishing compound. Stropping takes 30 seconds and restores your edge between sessions. This single habit separates carvers who enjoy the craft from those who quit in frustration.
A simple test: after stropping, try to slice a thin curl from the end grain of your basswood block. If it curls cleanly without tearing, you’re sharp enough. If it tears or crumbles, strop more.
Choosing Your First Project (And Why This Decision Matters More Than Tools)
Here’s a mistake most beginners make: they choose projects based on what looks impressive rather than what teaches them the most. A small bear figure looks great finished, but it’s frustrating as a first project because the tight detail work requires knife control you haven’t built yet.
The best first project is a simple spoon, specifically a flat spatula-style spoon with no hollow bowl. Here’s why it works:
- The shape is long and simple, giving you room to practice straight cuts and gentle curves.
- You work with and across grain repeatedly, which teaches you to feel what direction you’re cutting.
- The finished object is actually useful, which provides real motivation.
- You can make several in a few hours, accelerating the learning curve.
Once you can make a clean spatula spoon, move to a spoon with a shallow bowl (this is where the hook knife earns its place), then to a deeper ladle shape. This progression isn’t arbitrary; each stage adds exactly one new challenge.
A comfort bird is another excellent first project if spoons don’t appeal to you. It’s a small, palm-sized oval shape carved to sit naturally in the hand. There’s no complex detail work, just rounded forms that teach you how to remove bulk wood efficiently and how to smooth transitions.
Several beginner kits (notably BeaverCraft’s DIY01) include pre-marked basswood blanks, a pattern, and sandpaper, which is genuinely helpful for a first project because you’re not also trying to figure out proportions while learning to hold a knife.
Understanding Wood Grain: The Thing Nobody Explains Clearly
Most beginner frustration comes from cutting against the grain without realizing it. Here’s a simple way to understand it:
Imagine the wood fibers as a stack of drinking straws running roughly along the length of a branch or board. When you cut with the grain, your blade slides between straws, and they separate cleanly. When you cut against the grain, you’re trying to push the straws into the stack; they resist, tear, or chip.
In practice: if your knife is suddenly tearing the wood instead of slicing it, don’t push harder. Flip your workpiece and try the cut from the opposite direction. Nine times out of ten, this solves the problem immediately.
End grain (the cross-section at the top or bottom of a blank) cuts differently from face grain. It requires more pressure but leaves a beautiful, smooth surface. Learning to read grain direction visually, looking for the subtle lines running through the wood, takes about 5–10 hours of practice and then becomes second nature.
A Realistic First Weekend
Saturday morning (2 hours): Buy or order a basswood block (roughly 2″ × 2″ × 6″) and a sloyd knife. If you buy in person, check a local woodworking store or craft supplier. Draw a simple spoon silhouette on the wood with a pencil. Spend this session just removing the obvious waste wood rough cuts to get close to your outline. Don’t try to refine anything yet.
Saturday afternoon (1.5 hours): Start refining the profile. Work on the handle first, since it’s the simplest shape. Make deliberate, light cuts. Your hand will be tired before you expect it, carving uses muscles you don’t normally use. Stop before you’re fatigued, because tired hands make mistakes.
Sunday (2–3 hours): Finish shaping, sand through 120, 180, and 220 grit, then apply a food-safe finish. Walnut oil (the kind sold for salad dressings at any grocery store) works perfectly and costs $6–8. Apply it thin, let it soak in for 30 minutes, wipe off the excess, and let it cure overnight.
By Sunday evening, you’ll have a finished, usable wooden spoon. Not perfect, but genuinely made by your own hands, from a block of wood, in a weekend.
Common Mistakes That Slow Beginners Down
Gripping the knife too tightly. Your hand should guide the blade, not strangle it. A white-knuckle grip transfers to jerky cuts. Practice holding the knife firmly but with relaxed fingers.
Trying to remove too much material in one cut. Thin slices give you control. Aggressive cuts give you chips and unexpected splits. This is especially important near the end grain.
Skipping sharpening. If your cuts feel like sawing rather than slicing, your knife is dull. Strop it. Thoughtfully, five strokes per side and try again.
Choosing complicated first projects. Intricate animal figures look great on YouTube, but they’re genuinely hard. Start simple and let complexity come naturally.
Not securing the wood properly. A lot of beginner cuts happen when the wood moves unexpectedly. Use a bench hook, a clamp, or even a piece of non-slip mat on your work surface.
Safety Without Paranoia
Wood carving does involve sharp blades, but the injury rate is low when you develop two habits: cut away from your body when possible, and use a thumb guard or cut-resistant tape on your non-knife thumb (which often acts as a brace against the blade). These aren’t optional niceties; most carving injuries happen to the thumb of the hand holding the wood.
Cut-resistant gloves are helpful for beginners but can reduce tactile feedback, so many experienced carvers prefer tape on just the thumb and forefinger. A simple leather thumb guard, which you can make from an old glove or buy for a few dollars, is practical and comfortable.
What Actually Happens After Your First Project?
Most people who complete one carving instantly want to produce another. That is the hook. The learning curve flattens out remarkably quickly; your second spoon will be noticeably cleaner than your first, and your fifth will look like a professional crafted it.
Around hour 20-30, you’ll start to form ideas regarding wood. You’ll note that freshly cut (green) wood carves very differently from dry kiln-dried wood. You can see fallen branches on a walk and wonder what they could become.
The craft scales in whatever direction interests you; some individuals carve spoons for a lifetime and become experts at it. Others focus on figures, relief carving, or sculptural work. There is no perfect path. The tools you begin with will take you further than you anticipate, and the additional tools you eventually want will become apparent through use.