
I’ve spent years tweaking my home office. Not because I’m a tech influencer who changes gear every month, but because I’m a corporate lawyer who spends more time at that desk than in my bed.
Every upgrade I made wasn’t about looking cool; it was about staying focused longer, reducing back pain, and feeling energized when I sat down (or stood up).
Below is the checklist I wish someone had handed me when I started. No fluff, no filler. Just the 10 things that actually move the needle.
1. The Desk – Size, Stand, and Surface
Let’s start with the foundation: your desk. In 2026, three non-negotiable features matter.
Sit-stand functionality. If you sit for eight, ten, or twelve hours a day, you’re asking for lower back trouble. A 2022 study showed that alternating between sitting and standing throughout the day reduced lower back pain, improved vigor, and cut stress. I aim for two standing sessions—one hour in the morning, one in the afternoon. It gives me a different physical perspective and a jolt of energy. Look for a desk with memory presets so you can switch heights with one button.
Maximum size for your space. A bigger desk is almost always better. You get more screen real estate, room for a notebook and iPad, and the ability to stand without having your face pressed against the monitor. Depth matters especially. I’m tall, and I need at least 80 cm (31.5 inches) depth to naturally rest my arms while standing. If your space allows, go with 180 cm width x 80 cm depth. That’s the sweet spot for a triple-monitor setup.
An aesthetic you enjoy. Your desk should be a place you want to work. Walnut, bamboo, white—choose a finish that makes you feel calm. I’ve had my Yo-Yo Desk Pro 2 (180×80 cm) for over five years. It’s pricey at roughly £720, but after four years of daily use, it still looks and works like new. If that’s out of budget, look for a used sit-stand frame and add your own top.
One thing I see people overlook: make sure the desk’s width fits your monitors when they’re placed side-by-side. A 120 cm width barely holds two 27-inch monitors with stands. Measure your gear before you buy.
2. Monitor Setup – How Many Screens Do You Really Need?
The single-monitor-with-laptop-stand trend is popular, but I think it’s a mistake for anyone who spends serious hours at a desk. Here’s why: having fewer than two monitors forces constant alt-tabbing, which eats minutes every hour. If the budget is tight, I’d sacrifice monitor quality to get two good screens rather than one amazing one.
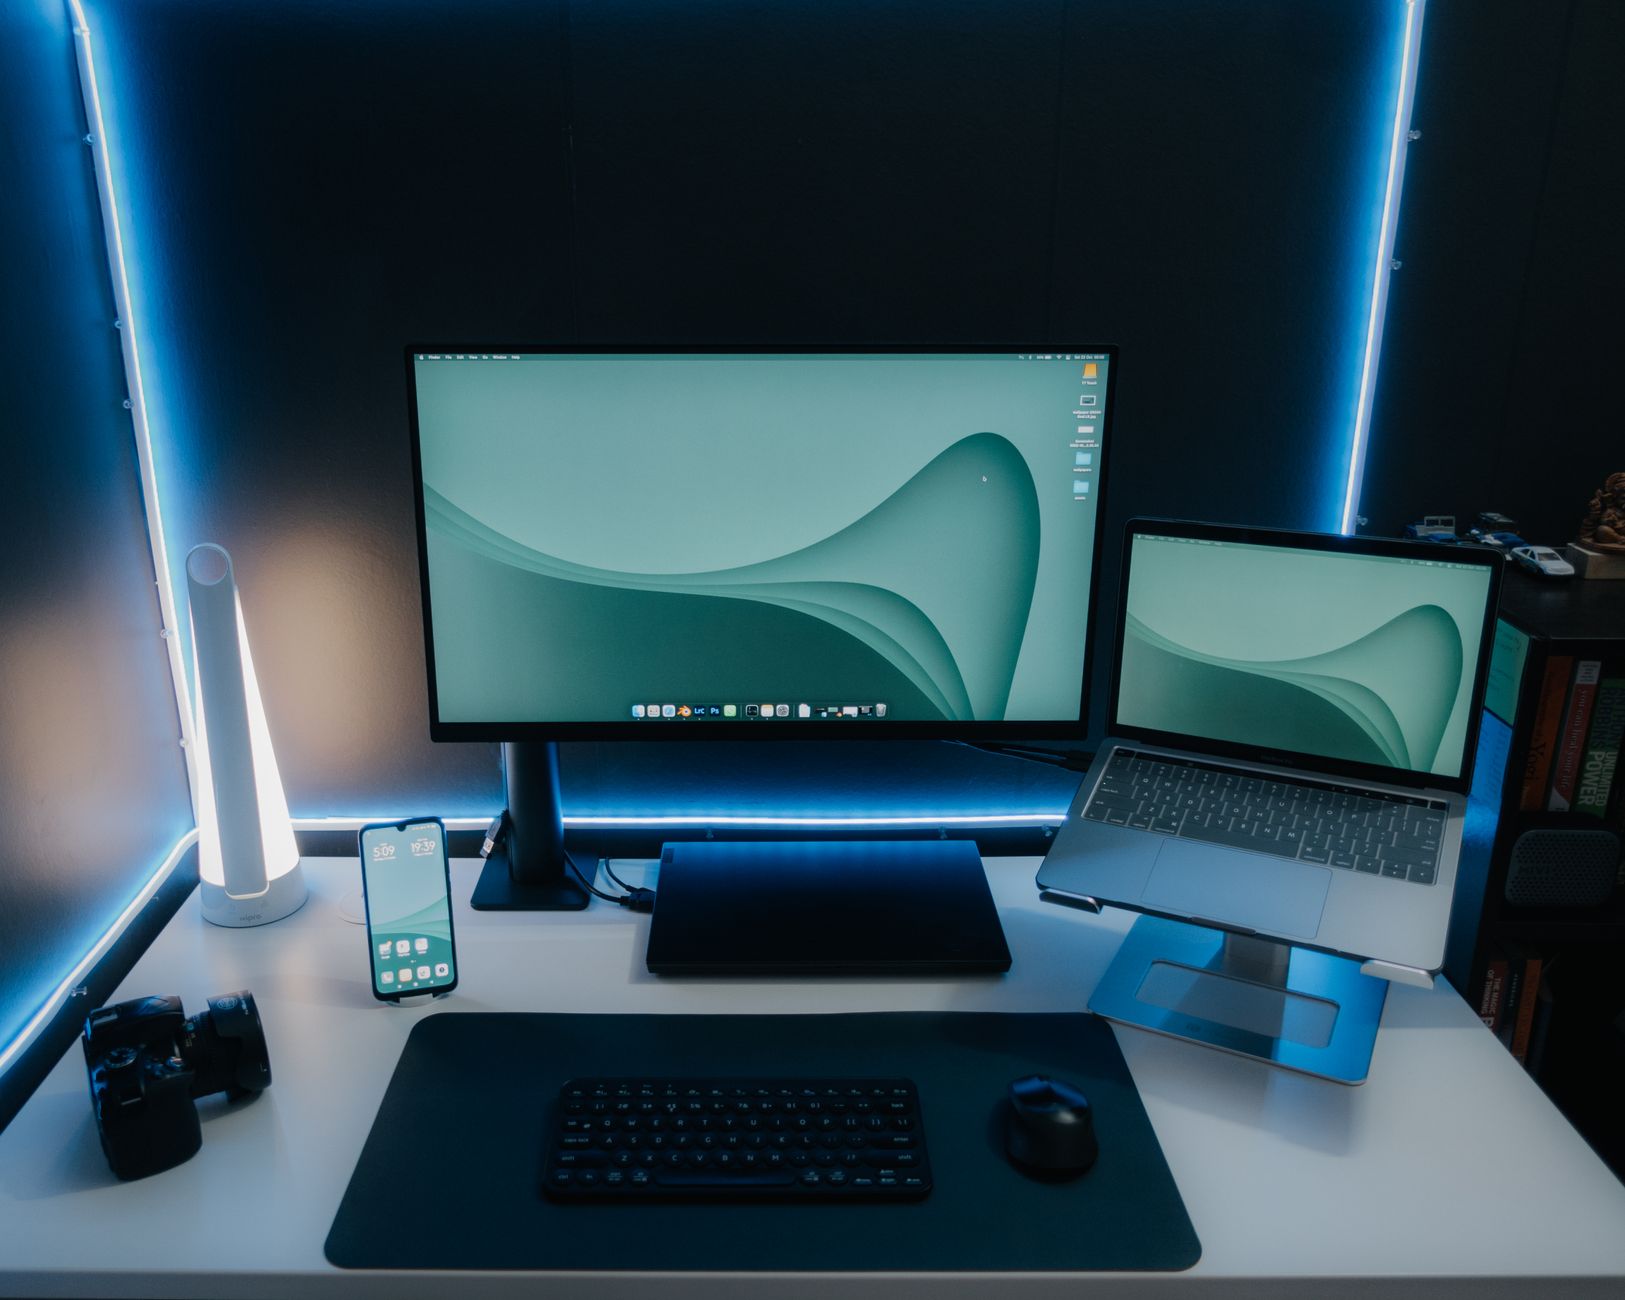
My own setup uses a central 34-inch LG curved monitor (around $349) and a 27-inch BenQ 4K side monitor. The BenQ is designed for Mac users—colors match perfectly, and the screen quality is stunning for photo and video work.
But the real magic is in the arrangement: I keep my main task (say, writing in Craft or reviewing a contract) on the left half of the central monitor, a chatbot like Claude or ChatGPT on the right half, and my side monitor shows reference documents, email, or Slack. That lets me stay focused on the center while keeping secondary info instantly visible.

If you’re starting from scratch, aim for a 27-inch 4K main monitor and a second 24-inch or 27-inch monitor. If you’re on a tight budget, consider used corporate monitors from Dell or HP—they’re reliable and cheap. Just make sure both monitors are at the same resolution and refresh rate if possible to avoid eye strain.
3. Docking Station – The Unsung Hero of Multi-Monitor Workflows
Once you have two or three monitors, you need a single cable to connect them to your laptop. That’s where a docking station comes in. Most Mac users hit a wall: base M1/M2/M3 chips only natively support one external display. Even the newer M4 and M5 chips max out at two monitors. The fix is DisplayLink technology, which uses software to drive additional screens.
The Anker Prime DL7400 docking station is currently the best value for both Mac and Windows. It supports up to three displays (one 8K at 60Hz, two 4K at 60Hz) via DisplayLink. It’s also uniquely portable, with no external power brick, because the power supply is built into the unit.
That’s a huge space saver under your desk. It has an LCD screen that can show a clock or charging info, plus Active Shield fan cooling to prevent overheating during long data transfers.
Price is around £160–£200, depending on sales. One thing I recommend: plug your Ethernet cable into the dock if you have a Wi-Fi extender. It gives you faster, more reliable internet than Wi-Fi alone.
Real-world example: Last week, I was reviewing a 50-page contract while researching case law on a second monitor and running Slack on a third. With the dock, I unplug one USB-C cable from my laptop when I move rooms, and everything reconnects in under a minute. That would be impossible without a hub.
4. Monitor Height – Protecting Your Neck and Eyes
Here’s a mistake almost everyone makes at first: monitors that are too low. The top of your screen should be at eye level when you’re sitting upright. If it’s not, you’ll crane your neck forward, the fastest route to chronic headaches and neck pain.
Two tools solve this. First, a desk shelf raises your main monitor and gives you hidden storage underneath. The Grovemade solid wood shelf is gorgeous (around $690), but the walnut plywood version is more reasonable. I use the solid wood one because I love it, but honestly, the plywood is 90% as good for half the price. Other brands like Oakywood make similar shelves.
Second, a monitor arm for your side screen. The BenQ Ergo Arm (£119) clamps to the desk edge without taking up any surface area. It lets you adjust height, tilt, and angle freely. I use the arm for my 27-inch BenQ, while the LG sits on the shelf. That combo gives maximum flexibility.
5. The Chair – Your Most Expensive but Most Important Investment
Chairs are where people cheap out, and it’s the worst place to save. I’ve tested everything from IKEA Markus to gaming chairs to Herman Miller. The one I currently use is the Lenovo Omni (around £900). Yes, that’s a lot. But consider this: if you sit 10 hours a day for 250 days a year, that chair costs you about 36 pence per hour of use. Suddenly, it doesn’t seem so crazy.
Key features to look for in any ergonomic chair:
- Customizable lumbar support. The Omni uses a motorized backrest that hugs your spine’s S-curve. You can adjust the exact position via buttons on the armrests. That’s a level of precision impossible with manual dials.
- Adjustable armrests in four directions: height, angle, width, and tilt. Your elbows should sit at 90° with your forearms parallel to the desk.
- Neck support that reaches your head when you’re leaning back during breaks.
- Dynamic support that moves with you. The Omni’s seat, backrest, headrest, and armrests are interconnected, so when you shift, the chair shifts with you.
- Bonus: massage. The Omni has a motorized spinal stretch and massage feature. I use it for five minutes after lunch to reset my lower back. It’s not a gimmick—it genuinely helps.
If £900 is too much, look for a used Steelcase Leap or Herman Miller Aeron in good condition. They’re built to last decades and often appear on Craigslist or Facebook Marketplace for <£500.
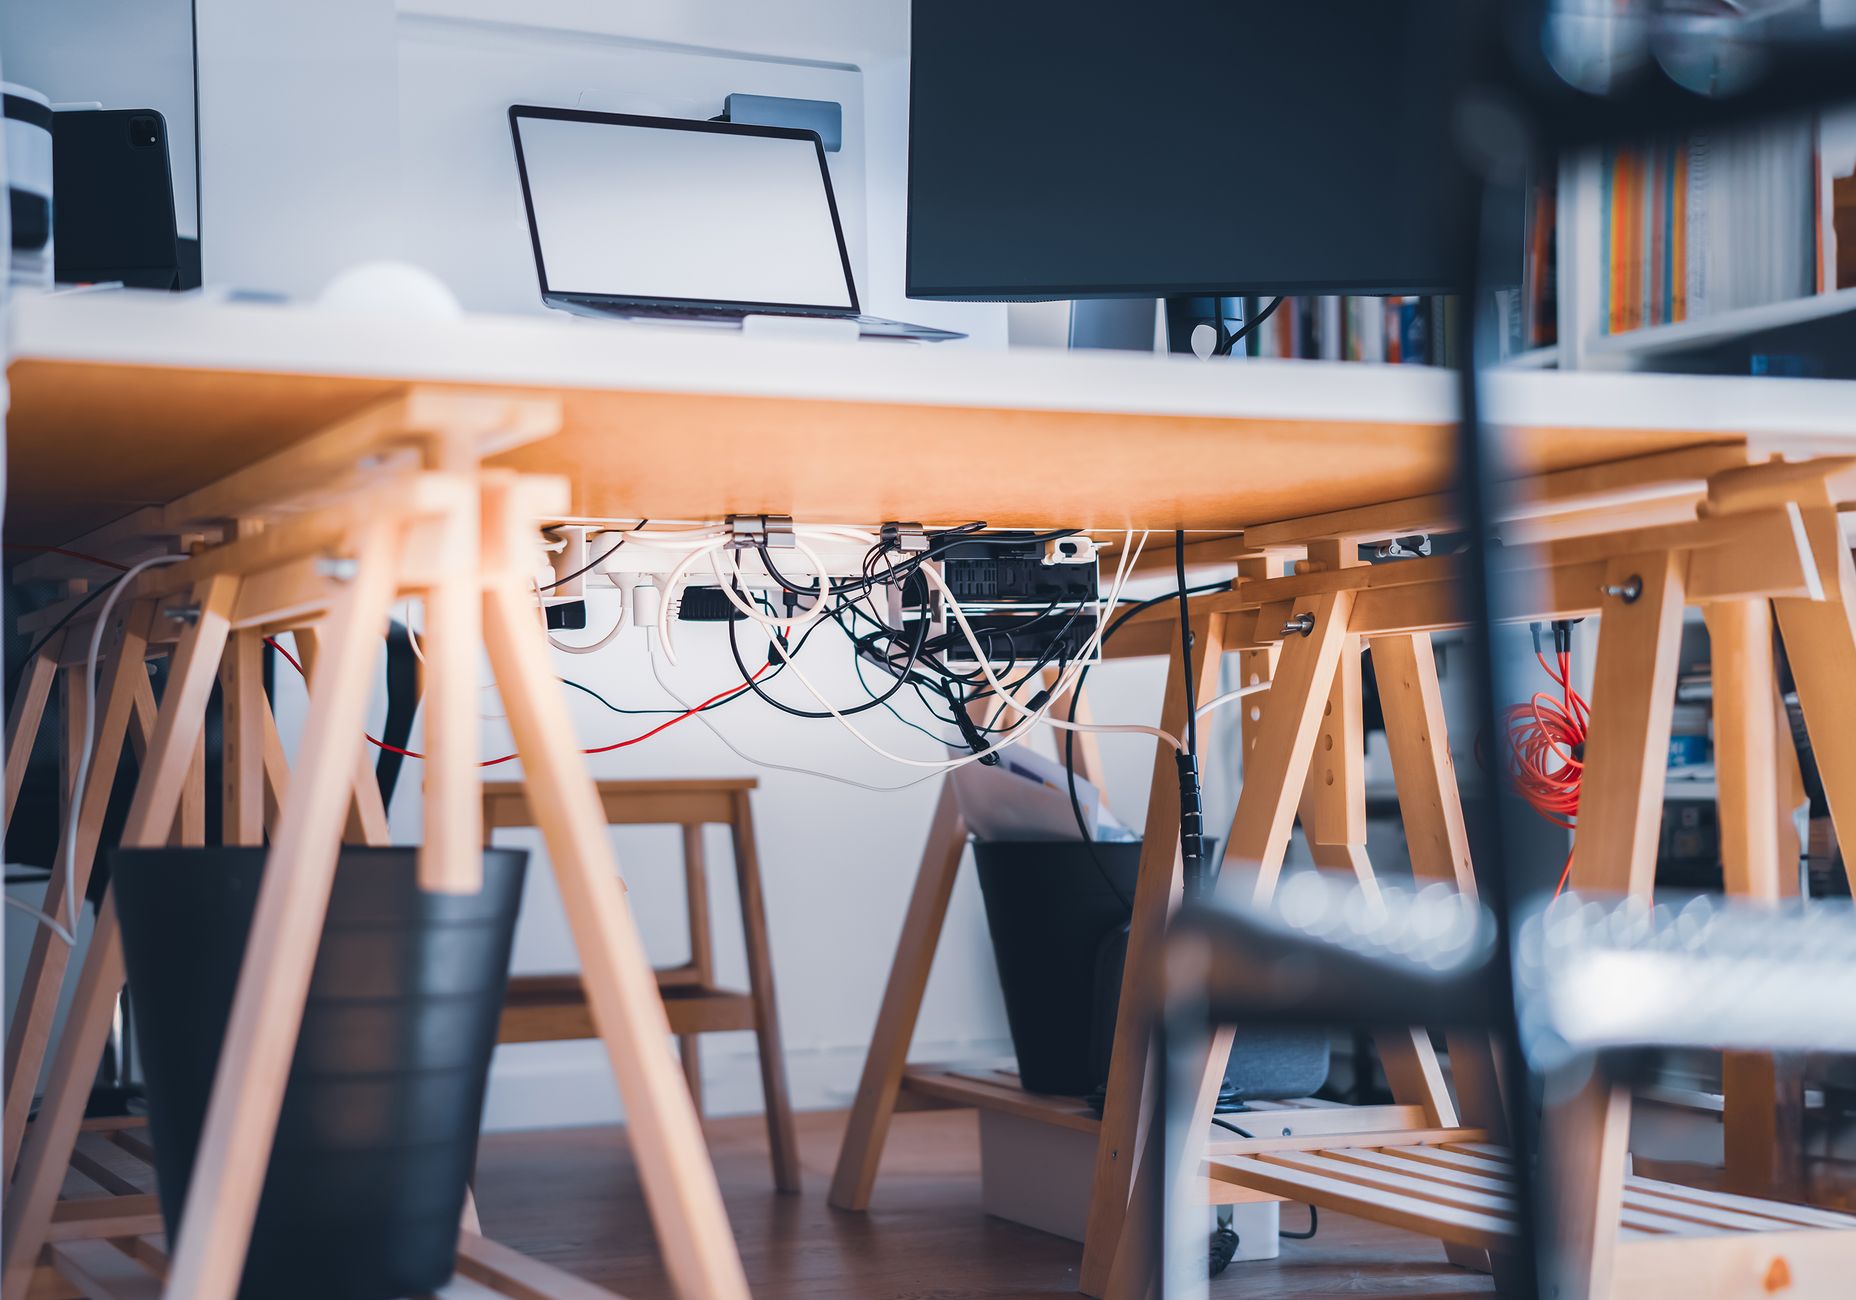
6. Cable Management – Cheap Upgrades That Transform Your Desk
Nothing kills a clean desk vibe faster than a tangle of cables. The good news: you can fix this for under £100.
Start with a retractable USB-C charging cable (£13). Stick it under the back of your desk with a spring-loaded holder. When you need to charge your keyboard, mouse, or headphones, just pull it out and let it retract. No more hunting for cables in drawers.
Next, get a cable management tray that clamps to your desk’s back edge. The Uni (a popular brand) makes a £48 tray with built-in straps. It holds every power strip, plug, and Wi-Fi extender out of sight. I also use my Eero Wi-Fi booster inside the tray, freeing up desk space for a plant or lamp.
Finally, buy quality cables in the correct lengths. A 2-meter cable for your monitor, a 3-meter cable for the other. Too short, and you’ll see tension; too long, and you’ll have excess loops. Use Velcro cable ties (a £10 bundle) to bundle any remaining loose wires.
7. Lighting – Why You Need a Screen Bar and Smart Lamps?
Bad lighting causes eye strain, headaches, and that “sleepy at 3 PM” feeling. The single best fix is a screen bar that mounts on top of your monitor. The BenQ Screenbar Halo 2 is the best I’ve used.
It lights your desk without creating glare on the screen, and it has a rear-facing light that illuminates the wall behind your monitor. That reduces contrast between the bright screen and dark wall, easing eye fatigue.
The Halo 2 costs around £120, but it’s worth it for the automatic brightness sensor and motion detection—it turns on when you sit down. The remote control is solid, too.
Beyond the screen bar, add two ambient lights with smart bulbs. I use a Nordlux LED table lamp with an E27 smart bulb and an IKEA desk lamp on a smart plug. Both are controlled via Alexa.
I set them to cool white during deep work and warm white in the evening. Being able to adjust brightness and color temperature with voice commands is one of those small luxuries you quickly can’t live without.
8. Keyboard and Mouse – Don’t Skimp on the Tools You Touch All Day
The Logitech MX Keys and MX Master series are the industry standard for a reason. They support up to three devices simultaneously, which means you can switch between your work laptop, personal Mac, and even an iPad with one button press. The full-size keyboard with a numeric keypad is ideal for lawyers, accountants, or anyone who types numbers.
The MX Master 4 mouse is a meaningful upgrade over the previous version: the coating is more durable and won’t wear off in your hand. It also has a scroll wheel that switches between free-spinning and notched modes. For multitasking across monitors, that scroll wheel is magic.
Total cost for keyboard and mouse: roughly £170. If you’re on a budget, the standard MX Keys and MX Master 3S are still excellent and can be found refurbished for under £100.
9. Audio – When Headphones Aren’t Enough
I do most deep work with headphones on (no lyrics, just ambient or lo-fi beats). But sometimes my partner and I both work in the same room on a Saturday afternoon, and we want background music without wearing cans. That’s where a good speaker shines.
Replace your cheap smart speaker with something like the Sonos Era 100 (£200). The sound quality is genuinely impressive for a unit that size—far above any Amazon Echo or Google Nest. It also works as an Alexa device, so you can retire your old Echo Dot. The Era 100 integrates with other Sonos speakers if you ever expand, and the app is solid.
Real-world example: I used an Echo Dot for years and thought it was fine. Then I borrowed a friend’s Era 100 for a week. The difference in clarity in low frequencies was night and day. My music on low volume no longer sounded muffled. I bought one within 48 hours.
10. The Backpack – Getting Your Setup Out the Door
If you ever commute between home and office, your gear needs a decent bag. Most tech backpacks are either bulky (like camera bags) or cheaply made. I recommend a minimalist backpack with a padded laptop sleeve, a notepad pouch, external pockets, and a full 180° opening so you can see everything inside.
The one I use is the Mellows backpack, made from 15 recycled plastic bottles. It costs £69 with free UK delivery (use code for 10% off if applicable). It opens flat, unlike top-loading bags that force you to dig blind. It fits a 16-inch laptop, charger, headphones, water bottle, and files. If you want a different brand, look for similar specs from Fjällräven or Peak Design, but expect to pay £100–£150.
| Upgrade Category | Recommended Option | Price Range | Alternatives |
|---|---|---|---|
| Desk | Yo-Yo Desk Pro 2 (180×80 cm) | ~£720 | IKEA Trotten with a sit-stand frame |
| Monitors | 34″ LG Curved + 27″ BenQ 4K | $349 + ~£400 | Dual Dell 27″ 4K (used) |
| Docking Station | Anker Prime DL7400 | ~£180 | CalDigit TS4 (more ports but ~£250) |
| Monitor Height | Grovemade shelf + BenQ Ergo Arm | ~$690 shelf + £119 arm | Oakywood shelf + Amazon Basics arm |
| Chair | Levenovo Omni | ~£900 | Used Steelcase Leap V2 (~£400) |
| Lighting | BenQ Screenbar Halo 2 + two smart lamps | ~£120 + ~£60 | Xiaomi Monitor Light Bar (£20) |
| Keyboard & Mouse | Logitech MX Keys + MX Master 4 | ~£170 | Logitech MX Keys Mini + MX Master 3S |
| Audio | Sonos Era 100 | £200 | IKEA Symfonisk Bookshelf (cheaper, ok sound) |
| Backpack | Mellows (or similar) | £69 | Peak Design Everyday Backpack (~£250) |
Frequently Asked Questions
Why not just use a laptop stand instead of a second monitor?
A 14-inch laptop screen is roughly half the usable area of a 27-inch monitor. Yes, a stand raises it to eye level, but you’re still stuck with a small, low-res screen. For deep work—especially if you need to reference two documents at once—a second monitor is vastly more productive. The only exception is if you’re on a shoestring budget and can’t afford even a cheap used monitor.
I have a Mac with an M1 chip. Can I actually run two or three monitors with the Anker dock?
Yes, but you need to install DisplayLink drivers. The Anker Prime DL7400 includes DisplayLink technology in the hardware. Once you download the free driver from DisplayLink’s website, your Mac will treat it as a second graphics card. I’ve used it for months without issues. One caveat: DisplayLink adds slight latency, so it’s fine for productivity, code, and video playback, but not ideal for high-refresh gaming.
Is a sit-stand desk really worth the money if I already have a good chair?
Yes, because sitting and standing work different muscle groups. Even the best chair can’t prevent the fatigue that comes from being in one position all day. Standing for one or two hours per day improves circulation, energy, and focus. If you can’t afford a full sit-stand desk, consider a convertible standing desk converter that sits on your existing desk (around £150).
How do I set up cable management on a budget?
Start with adhesive cable clips (about £5 for a pack of 20) to route your monitor and power cables along the back of your desk legs. Then buy a basic cable tray from IKEA or Amazon (£15–£20) that screws or clamps under your desk. Finally, use cheap Velcro straps (£8 for 50) to bundle any remaining loose wires. That’s under £40 total and hides 90% of the mess.
My budget for a chair is £300. Should I buy new or used?
Used, every time. Look for a Steelcase Leap or Herman Miller Aeron from the early 2010s. These chairs are built like tanks and often appear on Facebook Marketplace for £200–£400. Make sure to test the gas cylinder (it should raise and lower smoothly) and check for torn mesh on the back. For £300, you’ll get a chair that costs £1,000+ new.
Your remote work setup isn’t a collection of flashy gear. It’s a system that supports your body, your workflow, and your state of mind. Pick the upgrades that address your biggest pain point first, and build from there. Your future self will thank you.